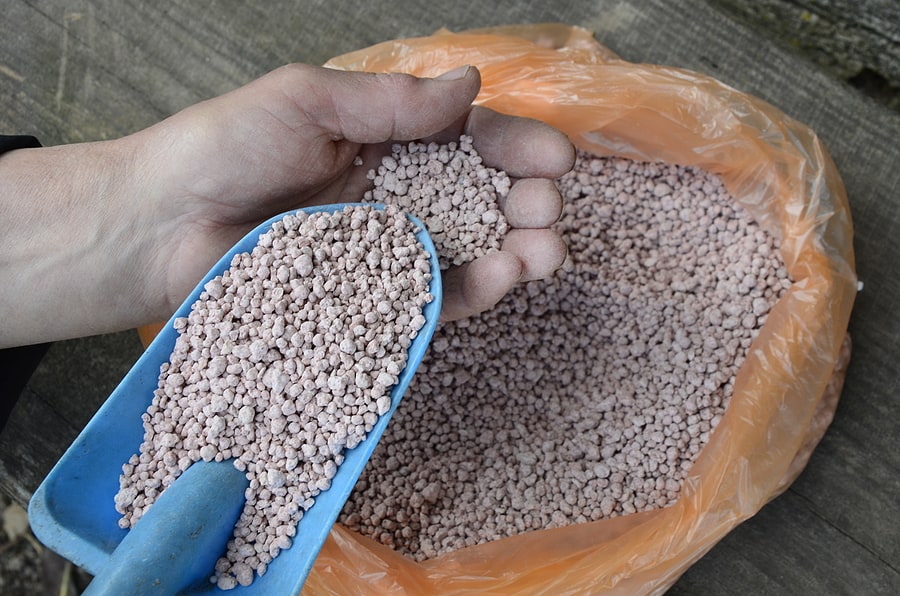
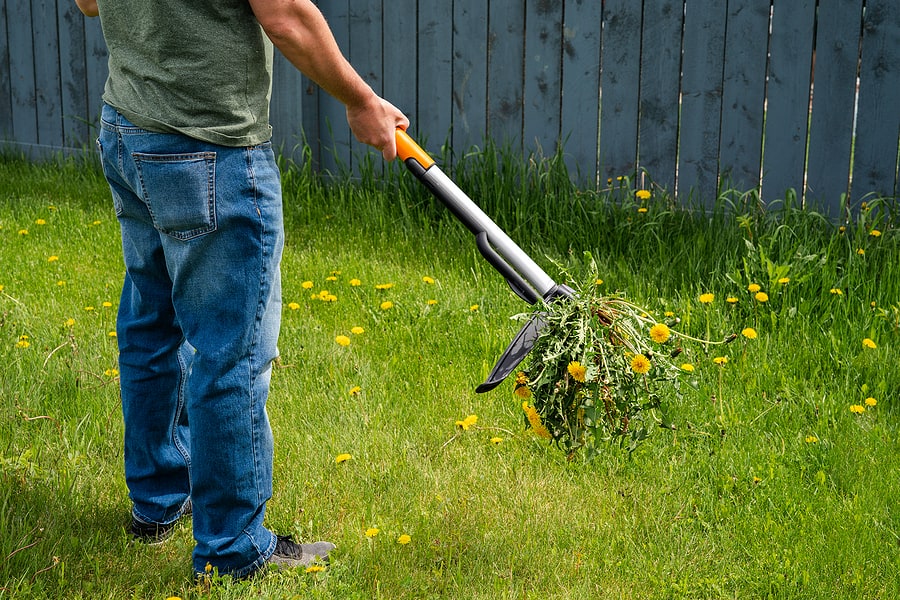
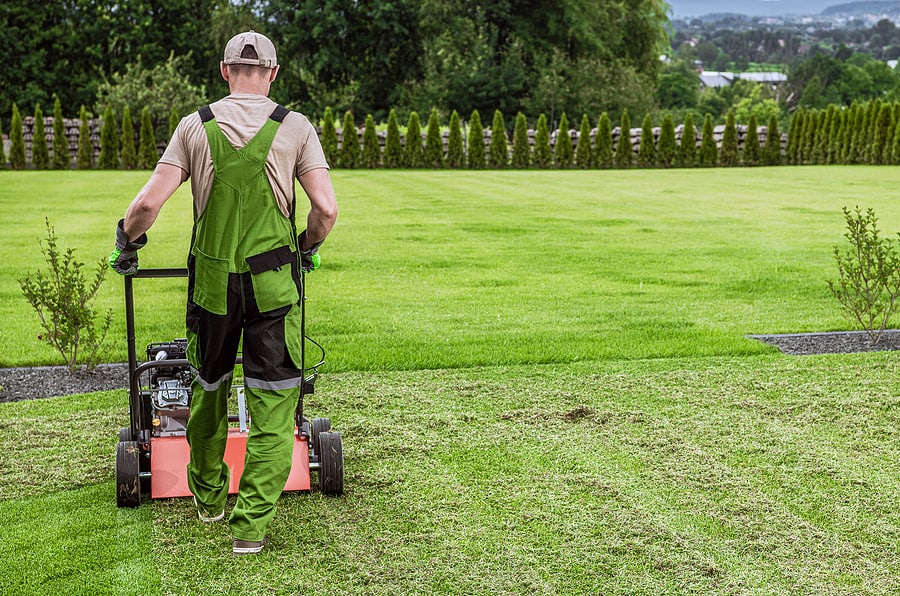
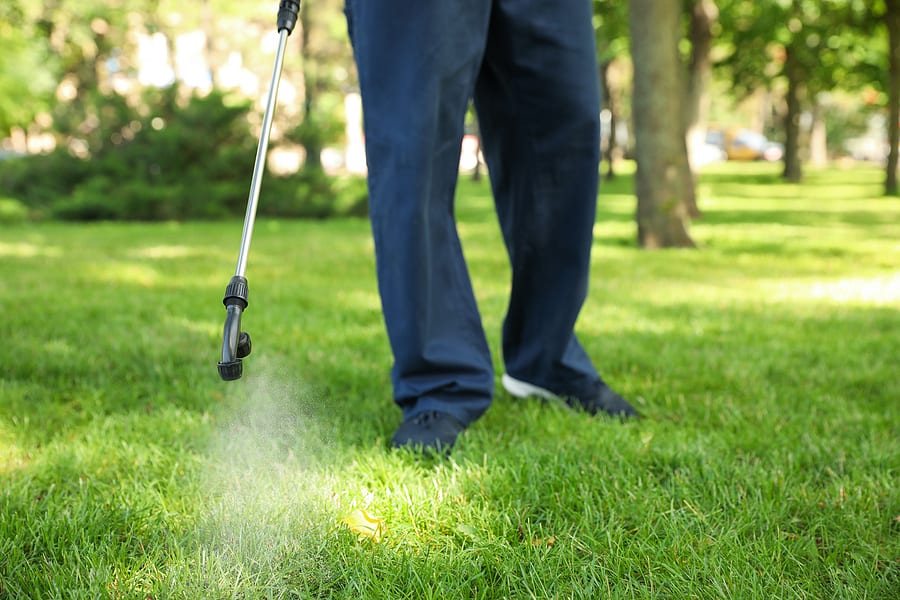
Pride in Turf Logo

Pride in Turf, as a lawn fungus treatment company, understands how challenging it is to maintain a lush and healthy lawn, as it requires a lot of vigilance and care. As summer ends and cooler temperatures arrive in Georgia, it is time to assess your lawn and see what kind of damage summer left behind. Lack of rain, too much rain, high heat, humidity, heavy traffic, and mowing can take their toll on your turf.

These types of stressors can weaken the immune system of your grass and leave it vulnerable to a number of fungal infections that can destroy that beautiful lawn. Dollar spot is a prevalent fungal disease that affects not only in Georgia, but worldwide. In this article, we will provide information about dollar spot - identification, symptoms, causes, and effective treatment.

Dollar spot lawn fungus is a common and frustrating problem for homeowners striving for an attractive and healthy lawn. Pride in Turf wants to help you restore your lawn to its former glory and keep it that way.

Identification of Dollar Spot

Dollar spot, scientifically known as Sclerotinia homoeocarpa, is a prevalent fungal disease. It gets its name, dollar spot, from the small round spots that are approximately the size of a silver dollar it forms on the grass blades. The spots are generally straw-colored or light tan lesions with distinct reddish-brown margins. As the disease progresses, the spots can merge to form larger, irregular patches. These can range from a few inches to several feet in diameter. Dollar spot is the most common turfgrass disease in North America.

Dollar spot primarily affects bermudagrass, but can impact warm season grasses as well as cool season grasses. Some other types of grass that can be affected include Kentucky bluegrass, creeping bent grass, perennial rye grass, annual bluegrass and fescue. Once primarily known for wreaking havoc on golf courses and recreational turf, dollar spot has become a common lawn problem for homeowners as well.

Symptoms of Dollar Spot

One of the primary symptoms of dollar spot is the presence of small spots on the grass blades. These spots are typically between 1 - 6 inches in diameter and appear bleached or light tan colored. They are often surrounded by a reddish-brown border, giving them a distinctive appearance different from a fungal disease like Pythium blight.

Over time, the affected areas may start to thin out and turn brown. The grass in these areas may become weak and lose its vigor. If left untreated, the patches can expand and merge, leading to larger areas of damage. In the early morning, or during periods of high humidity, you may notice a web-like mycelium or the grass blades. This white, cottony-growth is a clear indicator of dollar spot infection.

Under favorable conditions, such as extended periods of high humidity or excessive moisture, small tan-colored fungal structures called sclerotia may develop on the infected grass. These structures resemble tiny grains of sand and can be observed on the leaf blade, stems, or thatch layer.

Causes of Dollar Spot

Several factors contribute to disease development and the spread of dollar spot fungus. Some of the primary causes are discussed below:

Environmental Conditions: Dollar spot thrives in moderate temperatures ranging from 60 to 88 degrees. Additionally, extended periods of high humidity, dew, or foliar wetness provide ideal conditions for the fungus to grow and spread. Disease development is favored by warm, humid weather followed by cool nights that produce heavy dew in the spring and early summer. Dollar spot occurs primarily on home lawns and golf courses. The pathogen can survive unfavorable periods as dormant mycelium on infected plants and plant debris.

Low Nitrogen Levels: Nitrogen deficiency in the soil weakens the grass and makes it more susceptible to diseases, like dollar spot. Insufficient levels of nitrogen impair the grass's ability to grow and recover, allowing the fungus to gain a foothold.

Moisture Imbalance: Overwatering or watering at inappropriate times, such as late in the day, can create a moisture imbalance in the lawn. Excess moisture on the grass blades promotes the growth and spread of dollar spot. Excessive leaf wetness and fog contribute to lawn disease, as do water stress and excess thatch development.

Low Mowing Height: Mowing the grass too short weakens the turf and exposes it to stresses that encourage dollar spot development. Shorter grass blades have reduced energy reserves, making them more susceptible to fungal infections. Also, short lawns (under 3 inches) hold moisture on grass leaves and are more susceptible to this turfgrass disease.

Treatment and Prevention of Dollar Spot

Dollar spot disease is definitely frustrating; however, by creating optimal conditions for the grass to grow and thrive, you can reduce its susceptibility to diseases. As we know, healthy grass is much less prone to lawn diseases like dollar spot. Here are some key practices to consider controlling dollar spot:

Proper Mowing:

Maintain the proper mowing height for your grass type. Generally, keeping the grass a bit longer helps develop stronger roots and provides shade to the soil, reducing moisture evaporation. Adjust your mower height to allow the grass blades to reach a height of 2.5 to 3 inches.

Avoid removing more than one-third of the grass blade length during each mowing session. Frequent mowing helps prevent the grass from becoming stressed and weak, making it less prone to fungal infections.

Proper Watering:

Water deeply and infrequently to encourage deep root growth. Aim for about 1 inch of water per week, including rainfall. Watering deeply allows the roots to access moisture from the lower soil levels and reduces surface moisture that promotes fungal growth. Watering in the early morning helps the grass blades dry throughout the day, preventing prolonged leaf wetness.

Improve Soil Drainage:

Adequate soil drainage is essential for preventing excessive moisture accumulation, which can contribute to dollar spot development. If your lawn has poor drainage, consider aerating the soil to improve its structure and allow water to penetrate more effectively.

Fertilization:

Maintain a proper fertilization schedule to ensure the grass has sufficient nutrients for healthy growth. Regular applications of nitrogen-rich fertilizers promote vigorous grass growth, increasing its resistance to diseases. However, be cautious not to over-fertilize, as excessive nitrogen can lead to other issues. Light, frequent applications will reduce disease severity and promote recovery.

Thatch Management:

Thatch buildup can create an environment conducive to dollar spot development. Thatch is a layer of dead organic matter that accumulates between the grass blades and the soil surface. Excessive thatch prevents adequate air circulation, retains moisture, and provides a favorable habitat for fungal pathogens. Regular dethatching or core aeration can help manage thatch buildup and improve the overall health of the lawn.

Dethatching: Use a dethatching rake or a power dethatcher to remove excess thatch from the lawn. Dethatching should be done when the grass is actively growing, typically during the spring or early fall. Take care not to remove more than one-third of the grass blades in a single dethatching session.

Core Aeration: Core aeration involves removing small plugs of soil from the lawn, creating channels for air, water, and nutrients to penetrate the soil. Aeration helps alleviate soil compaction and promotes better drainage, reducing the chances of dollar spot development.

Overseeding and Reseeding:

Overseeding and reseeding are beneficial practices that can help fill in bare spots and maintain a dense and healthy lawn. By introducing new grass varieties, you can enhance the overall resilience of your lawn against dollar spot and other lawn diseases.

Select Disease-Resistant Varieties: When overseeding or reseeding, choose grass varieties that are known for their resistance to dollar spot. Consult Pride in Turf to identify the most suitable options for your region and climate.

Proper Seeding Techniques: Follow proper seeding techniques, ensuring good seed-to-soil contact for optimal germination. Water the newly seeded areas regularly to keep the soil consistently moist until the grass is well-established.

Good Hygiene and Sanitation:

Yes, good hygiene practices are also helpful in your lawn care routine. Maintaining good hygiene practices can help prevent the spread of dollar spot and other diseases. Implement the following measures:

Clean Mowing Equipment: Regularly clean and disinfect your mowing equipment, including the blades, to prevent cross-contamination between healthy and infected areas of your lawn.

Remove Diseased Debris: Remove and dispose of any diseased grass clippings or infected plant debris properly. This reduces the chances of the fungus spreading to other areas and dollar spot severity.

Avoid Traffic on Wet Grass: Limit foot traffic and equipment use on wet grass. Wet conditions can facilitate the spread of fungal spores, including those responsible for dollar spot.

Fungicide Applications

In severe cases or when cultural practices alone are insufficient, the use of fungicides can help control and manage dollar spot. Fungicides are available in different forms, including liquids, granules, and powders. It is crucial to choose a fungicide specifically formulated for dollar spot and follow the instructions provided. Consider the following points when using fungicides:

Timing: Apply fungicides at the first signs of dollar spot symptoms or when conditions are favorable for disease development. Early intervention helps prevent the spread and further damage. Consult wit Pride in Turf to determine the appropriate timing for your area.

Application Frequency: Depending on the product used, you may need to reapply the fungicide at specified intervals. Follow the label instructions carefully and adhere to the recommended application frequency.

Rotation of Products: To prevent the development of fungicide resistance in dollar spot pathogen, it is advisable to rotate between different fungicide products with varying active ingredients. Alternating between different chemical classes can help maximize effectiveness. Resistance to certain fungicides has occurred with Sclerotinia homoeocarpa, so using a control program is suggested.

Systemic vs. Contact Fungicides: Systemic fungicides are absorbed by the grass and provide long-lasting protection from within. Contact fungicides, on the other hand, remain on the surface of the grass blades and offer temporary protection. Both types have their advantages, and the choice depends on the severity of the dollar spot infection and personal preference.

We recommend that you contact us at Pride in Turf for recommendations and assistance with fungicide products and applications. We have access to fungicides that work for specific lawn diseases that you may not have access to. It is also important to make sure this is done correctly, and the experts at Pride in Turf will ensure the job is being done right.

Summary

Preventing and controlling dollar spot lawn fungus requires a combination of proper cultural practices, diligent lawn care, and the strategic use of fungicides when necessary. By implementing these measures, you can maintain a healthy and vibrant lawn that is resistant to the development and spread of dollar spot. Remember, consistency and regular maintenance are key to long-term success in managing this fungal disease.

Dealing with lawn diseases can be very challenging for the homeowner. Please contact Pride in Turf with questions or assistance. Our experts can analyze your lawn and know exactly what is needed to help you get your beautiful lawn back and prevent future outbreaks of lawn disease.

Pride in Turf wants your lawn to be the envy of the neighborhood!

Pride in Turf understands how important a well-manicured lawn is to many homeowners. That is our goal with our lawn fungus services, and we want the same for you. It is important to control Pythium blight, as it can quickly turn your green, lush lawn into a brown, diseased mess. We will delve into the details of this fungal disease - its symptoms and best practices to eradicate this destructive fungus from your lawn. We hope this information is useful in helping you keep a healthy lawn.

Understanding Pythium Blight

Pympythium blight is caused by the fungal pathogen Pythium spp., and is also known as cottony blight or grease spot. It is a common lawn disease that thrives in hot and humid climates, typically appearing during periods of high humidity with daytime temperatures above 86 degrees and night temperatures above 68 degrees. Excessive moisture, poor drainage, overwatering, and compacted soil are contributing factors that create an environment that is conducive for pythium blight development. If left untreated, it can spread rapidly, causing extensive damage to your turf.

The lawn fungus Pythium blight occurs mostly in cool season grass types, such as tall fescue, creeping bent grass or perennial rye grass; however, it can also impact warm-season grass types like Bermudagrass or Zoysia. The pathogens, Pythium SPP., thrive in warm and wet conditions, making them particularly prevalent during periods of highly humid or hot humid weather with excessive moisture. These pathogens can persist in the soil and thatch layer, waiting for favorable conditions to attack the turfgrass. Once the disease establishes, the lawn fungus spreads rapidly, leading to extensive damage.

Early fall through late spring are times when pythium blight is more common in the south. Pythium blight appears suddenly during hot, humid weather and is common in the wettest areas and in the surface drainage pattern. This lawn disease is harshest on immature grasses and seedlings and is not as commonly found in home lawns. This turfgrass, however, can plague commercial or residential landscapes.

Many pythium species cause diseases of roots, crowns, and/or foliage that result in a general decline of turfgrass stands. When the roots and crowns are attacked, the disease is called Pythium root rot. Disease may occur in small patches or involve large areas, especially on highly maintained golf course greens.

Even though there are many pythium species, pythium aphanidermatum is the primary species associated with pythium diseases in the US. The lawn disease often grows in lines following paths where water drainage occurs, or in a lawn's mowing pattern. Mycelium, the gray mold created by pythium aphanidermatum can survive in soil as well as on dead or cut grass blades.

Symptoms of Pythium Blight

Identifying Pythium blight early is crucial for effective pythium blight control. Pythium blight appears initially as circular, small patches, usually measuring one to three feet in diameter. The patches exhibit a dark brown or black water-soaked appearance, which may resemble a grease spot or irregularly shaped blotches. In the morning, a white, cottony growth (mycelium) may be visible on the patches.

The mycelium it most abundant when infected areas are wet. Once the infected grass dries, the disease becomes less visible and yellow patches appear where the greasy shapes were. Pythium aphanidermatum forms the gray mycelium or fruiting bodies

The mycelium produced by Pythium spp. is similar in appearance to other turfgrass diseases such as dollar spot and brown patch. As the disease progresses, the patches enlarge rapidly, often merging to form larger areas of dead, brown grass.

Pythium blight first appears as small, sunken circular patches up to one foot in diameter during hot, humid weather. In warm-season turf such as bermudagrass putting greens, pythium blight first appears as small black or purple spots. These can expand into larger irregular areas, especially during prolonged periods of huid rainy, and/or cloudy weather any time of the year.

Symptoms of pythium root rot may spread in drainage patterns during periods of heavy rainfall. The pathogen may cause seedling damping-off, or root rots. On individual plants, the crowns, roots rhizomes, and/or stolons will appear dark and greasy. The depth and density of roots will be drastically reduced in affected areas. Pythium root rot occurs in areas with high soil moisture, poor drainage, and low light. Disease can be severe in locations with low mowing height and excessive wear.

Control of Pythium Blight

Proper lawn management practices play a vital role in preventing and controlling disease development. There are many factors to consider in controlling pythtium blight in lawns, whether you have perennial ryegrass, tall fescue, kentucky bluegrass, annual bluegrass, or another type of turfgrass. Pythium blight is susceptible on all types of grass.

The following are some factors to follow in controlling pythium blight in your lawn:

Mowing Practices:

It is important to mow your lawn at the appropriate height and maintain the lawn at the appropriate height for your grass type and grass blades. This encourages healthy growth and air circulation. Also, keep your mowing equipment in good condition. It helps to mow frequently to maintain the appropriate height to help prevent pythium blight.

Avoid mowing wet, infected grass where mycelium is present to avoid spreading spores with the mower blades.

Irrigation:

Avoid excessive watering, as too much moisture creates an ideal environment for disease development of pythium blight. The best method is to water your lawn deeply, but infrequently. The best time to water is in the early morning. This helps give the grass time to dry out during the day and avoid prolonged leaf wetness.

Ensure Proper Drainage:

You need to correct any drainage issues in your lawn to prevent standing water in your lawn as well the possible formation of stagnant water. Excessive soil moisture is a cause for pythium blight, so it is important to assure you have proper drainage to prevent lawn fungus. Ensuring proper drainage also helps during damp weather conditions.

Aerating your lawn regularly is important, as aeration helps improve soil structure and drainage. This reduces soil compaction and enhances water and nutrient uptake. This also helps reduce the risk of pythium blight.

Reduce Humidity and Increase Sunlight Exposure:t

If you have shady areas in your lawn or you have overhanging branches or structures causing areas of shade, this can create areas of excessive moisture, conducive to pythium blight. You cannot control cloudy weather or humid weather, but you can remove obstructions, where possible, to allow more air circulation and ability for damp areas to dry. It is important to improve drainage wherever possible to prevent pythium fungus and help your grass to grow green and lush.

Thatch removal is an important method if controlling pythium blight fungus.. You should dethatch your lawn regularly to prevent thatch buildup. Thatch buildup creates a humid environment promoting pythium blight.

Reseeding and Renovation:

You should remove and replace severely infected areas. If pythium blight has caused extensive damage to your lawn, remove the dead grass and reseed or resod the affected areas. Try to choose disease-resistant grass varieties. Fungicide treated seed is also available.

Chemical Control of Pythium Blight

In severe cases or when preventive measures are insufficient, chemical control may be necessary. However, it should be used as a last resort in conjunction with cultural practices. It is best to consult with a professional for appropriate fungicide recommendations, as formulations and application methods vary. Also, professionals, like Pride in Turf, have access to be best fungicides that are not available to everyone to treat pythium blight.

If you choose your own fungicide, find one labeled for pythium blight and appropriatefor your turfgrass species. Fungicides containing ative ingredients like mefenoxam etridiazole, or azoxystrobin are effective against Pythium spp.

Timing and application is important, so apply fungicides according to the label instructions, targeting the active growth period of Pythium spp. Make sure to cover the affected areas thoroughly and follow recommended rates and intervals.

To minimize the risk of developing fungicide resistance, alternate between different fungicide classes with each application. Avoid relying on a single fungicide for an extended period.

Conclusion

Controlling pythium blight requires a proactive and integrated approach. By understanding the disease, implementing cultural practices, enhancing soil health, and judiciously employing chemical control methods, you can effectively manage and prevent pythium blight in your lawn. Regular monitoring and maintenance are crucial for long-term success. Prioritize healthy turf practices to keep your lawn vibrant and disease-free.

For the best results to deal with pythium blight in your lawn, contact Pride in Turf. They are professionals and know exactly what your lawn needs and and know how to treat your turfgrass. The experts at Pride in Turf will work with you and develop a plan that works for you to help you get rid of pythium lawn fungus or any other lawn issues you may be having.

Pride in Turf wants your yard to be the envy of the neighborhood!

Georgia's lush green lawns are a point of pride for homeowners and commercial property, especially those served by Pride in Turf, one of the best lawn fertilizer companies in Atlanta. Maintaining beautiful lawns can be challenging, especially when faced with the threat of brown patch fungus disease. Hopefully, this article will help provide information to help in your endeavors with your lawn.

Sometimes, you have to do some investigating to get to the bottom of the situation in your lawn to determine the cause of the brown spots. You first need to know what you are dealing with. Pride in Turf is always here to help.

Brown Patch Fungus

Many conditions can cause brown brown patches or areas of dead grass in your lawn. Brown patch disease is a prevalent lawn disease that is caused by the specific fungus Rhizoctonia solani. It primarily affects cool-season grasses, such as tall fescue, Kentucky bluegrass, and perennial ryegrass. This type of fungus usually occurs in mid to late summer in hot and humid weather.

Brown patch disease can wreak havoc on Georgia lawns and causes unsightly patches and weakened grass. Our goal is to give you a better understanding of brown patch and effective measures to control it.

Identification of Brown Patch

Since brown patch is a foliar disease, it harms the grass blades, but not the plant's crown or root system. Symptoms of brown patch can vary, and depend on factors such as climate and soil management of the turfgrass. Symptoms include circular patches of yellow or light brown, wilted grass that can measure anywhere from a few inches to several feet in diameter.

There may be yellow patches and/or brown patches that are roughly circular in affected areas. You may see a thin dark brown border around the patches that appears mostly during morning hours. It is surrounded by a smoke ring border and, usually, thinned patches of grass in the center. In the early morning, a grayish-white web-like mycelium can sometimes be observed on the grass blades and sometimes is mistaken for Pythium SPP.

Another type of fungal disease that has many similarities to brown patch is large patch (or zoysia patch). Either grass type can have very similar results, as they both have circular patches and brown patches. However, both types of fungus are affected are differently. Both types of fungus usually display thinned patches of light brown grass that is roughly circular in shape. Large patch prefers warm season grasses, and grasses commonly affected are zoysia and St. Augustine grass. On the other hand, brown patch prefers cooler weather grasses, and grasses commonly affected are tall fescue, ryegrass, and bluegrass. Both of these come from the family Rhizoctonia solani but are separate species and affect different grass types. Regardless of the grass species, the symptoms are very similar. So, even though they are in the same family and have very similar results, brown patch affects cool weather grasses (like tall fescue) where large patch affects warm weather grasses (like St. Augustine).

Understanding Brown Patch

Brown patch lawn disease is a prevalent lawn disease that thrives in warm, humid climates (like in Georgia). It becomes more active when temperates are warm (75 - 85 degrees) with high humidity or extended periods of leaf wetness, commonly in the early spring and mid to late fall.

As stated, brown patch is caused by the Rhizoctonia fungus. Other conditions that are favorable for brown patch are humid conditions and daytime temperatures of over 80 degrees during and nighttime temperatures over 60 degrees. Other conditions conducive to brown patch are periods of wet weather, such as abundant rainfall and continual wetness for 48 hours or more. Brown patch starts to develop when grass blades are continuously wet for days at a time.

Prevention of Brown Patch

It is important to identify this fungus early. Once your grass is infected, it can thin our your turf and cause significant damage to your entire lawn. Preventing brown patch can be challenging, but it is very possible.

The saying "prevention is better than the cure" holds true for lawn diseases, and brown patch is no exception. In order to help prevent brown patch in your lawn, proper lawn care if important. Following are some measures you can take in preventing fungal diseases and reduce the risk for brown patch fungus in your lawn.

Proper Lawn Maintenance:

It is important to properly maintain your lawn according to your turfgrass species, as a healthy lawn is more resilient to diseases and important to brown patch control. Follow a regular mowing schedule and ensure your grass stays at the recommended height. Avoid scalping the lawn, as this weakens the grass, making it more susceptible to infections. Lawns mowed correctly are more resistant to brown patch.

Watering Practices:

Overwatering creates an ideal environment for brown patch to thrive. Water your lawn in the early morning to allow time for the grass to dry during the day. Avoid evening watering, as extended periods of leaf wetness promotes disease development. Only irrigate based on weather conditions and in the early morning hours before sunrise. This will help control the dew covered turf and helps speed up the drying process. Never water after sunrise. It is best to avoid establishing turf in low areas or areas where water collects, as this could create problems with this disease.

Aerate and Dethatch:

Have your lawn aerated and dethatched annually. This helps the oxygen, nutrients, and water to filter through so they penetrate the roots. Aeration is good to correct soil compaction and dethatching is also important to prevent excessive thatch buildup. These things improve soil drainage, correct soil compaction, and reduce excess moisture helping maintain a beautiful lawn.

Proper Air Circulation:

It is important to help air circulation, as proper airflow reduces humidity levels in the lawn. Trim overhanging branches and vegetation that may obstruct air circulation. Air movement is very important to help prevent excessive moisture.

Fertilization:

Fertilization is important for your lawn; however, lush, actively growing grass is more vulnerable to brown patch attacks. It is best not to use a nitrogen fertilizer, as brown patch is more severe in lawns that have been fertilized with excessive nitrogen. Use a lawn fertilizer with balanced nitrogen, phosphorous, and potassium as this will keep the potassium levels in check.

Effective Control Measures

It is important to identify this fungus early. Once your grass is infected, it can thin out your turn and cause significant damage to your lawn. Lawns affected by brown patch can be corrected with some proper care. The following are some preventive measures in controlling brown patch you can take to improve your lawn and avoid fungal disease:

Improve Drainage:

If your lawn is prone to waterlogging, consider improving drainage by amending the soil with compost or using drainage solutions. It is important to address areas of poor soil drainage to prevent areas that are more prone to developing brown patch.

Reduce Shade:

If possible, trim trees and shrubs to allow more sunlight to reach the lawn. If you have structures in your yard that create too much shade, you may need to remove them or move them to another area. Too much shade causes increased humidity and conditions more conducive to brown patch. Reduced shade will help increase air circulation and decrease humidity, creating an unfavorable environment for the fungus.

Fungicides:

Apply fungicides specifically designed to prevent brown patch fungus. It is important to try cultural measures before using chemical control. Look for chemical control fungicides containing active ingredients like azoxystrobin, propiconazole, or flutolanil. Follow the instructions and recommended application rates very carefully. The best fungicides are typically only available to professionals, so you should contact Pride in Turf for help in this area.

Reseed:

Reseed with resistant varieties when overseeding or repairing your lawn. Again, contact Pride in Turf if need help with this.

Summary

Cool-season grasses, like tall fescue, may turn brown in the summer as they go into dormancy from the excessive heat. If your cool-season grass in your home lawn has brown patches in late spring, it may be due to many factors. Some possible causes of unhealthy areas of grass in home lawns can be caused by compacted soil, insect infestation, lawn mower injury, pet damage, uneven fertilizer application, or too much or too little water. It also could be a sign of a fungal disease, such as brown patch fungus.

Good lawn care practices are very important to prevent brown patch fungus or help get rid of it. You need to irrigate grass as needed; however, be careful not to over-water. You also must be sure your lawn has good drainage so that you do not have excessive water in your lawn. Water standing in your lawn or too much moisture over a period of time can start the growth of fungus.

If you start to see brown spots or circular patches, you need to find out the cause of that in order to keep your lawn healthy. You can follow the guidelines above for for good lawn maintenance and care. If you are unable to determine what is causing your lawn problem, or what you are doing is not working, contact Pride in Turf for help.

Pride in Turf has professionals who are well-trained and knowledgeable about all your lawn care needs. They can help you determine what your lawn needs, and they will be happy to take care of the problem for you.

Contact your local experts at Pride in Turf for your lawn care needs. They want your lawn to be beautiful and lush, so that you can enjoy it. Pride in Turf wants your lawn to be the envy of the neighborhood!

Pride In Turf is a local lawn fertilizer service in Atlanta. We come across fungus disease daily in our work. Zoysia patch fungus, often referred to as large patch, is probably the most common and severe disease of warm season grasses across Georgia, especially lawns with zoysia and St. Augustine grass.

Circular patches of turf affected with zoysia (large) patch fungus are most apparent in the spring and fall when warm season turfgrasses are either entering or exiting their winter dormancy period.

Cause of Zoysia Patch

This fungal disease is caused by the fungus Rhizoctonia solani. Zoysia patch fungus, or large patch, can appear in home lawns, landscapes, sports fields, golf courses, or sod farms. It occurs in spring and fall when turfgrasses are breaking dormancy and the environmental conditions are wet and mild.

Symptoms and Signs

Circular patches of affected areas can easily be observed in the lawn, as the diameter of the patches can range from 3 to 26 feet. Leaves of recently infected areas of zoysia patch fungus, located at the periphery of the patch may appear bright yellow or orange in color.

Sometimes, the disease may be perennial and recur in the same location year after year. When this occurs the diameter of the patches expands.

Water-soaked, reddish-brown or black lesions are observed when the R. solanni infection occurs on the grass leaves. Due to leaf sheath infections, dieback spreads from the leaf tip toward the base.

These diseased areas show symptoms of thin and sunken areas which develop in the patches and may be invaded by weeds. As the disease becomes more extensive, turf quality is reduced, disturbing the aesthetic value of the lawn.

Conditions favorable for Disease Development

Grasses are very susceptible to attack by pathogens in weather conditions where the temperatures of the thatch layer is between 50 and 70 degrees F and there is continuous moisture for 48 hours or more. Warm soil temperatures of over 80 degrees during the day and night temperatures of over 55 degrees are favorable conditions for disease.

Zoysia grass and warm-weather lawn grasses are not growing vigorously during early spring and fall. This can also occur during periods of cool weather in the summer, especially in shaded and/or wet areas

Excessive moisture levels in the soil, thatch, and lower turf canopy encourage the development of zoysia patch in lawns. Also, conditions such as poor drainage, restricted air movement, or excessive irrigation can increase the severity of this fungus in the lawn. This is true especially when these conditions occur for extended periods.

Brown Patch vs. Large Patch

The primary difference between these two fungal diseases is the grass they affect. While brown patch generally affects cool season grass (tall fescue, bluegrass), large patch only affects warm season grass such as zoysia and St. Augustine.

Brown patch disease in your lawn is easy to identify due to the large areas of dead grass the disease creates. It generally creates thin, circular patches of brown grass in lawns. Brown patch can be confused with large patch. The primary difference is the type of grass brown patch affects.

Control Zoysia Patch Fungus

Due to the damage to your lawn with zoysia patch or large patch fungus, it is best to use a multi-pronged approach to management. There should be a combination of genetic control, cultural control, and chemical control.

Genetic Control

It is best to establish a turfgrass species best adapted to your geographical area, location, situation, and landscape. All warm season grasses are susceptible to this fungal disease. In the Piedmont region of Georgia, zoysiagrass and centipedegrass usually show more dramatic symptoms.

Bermudagrass may also develop large patch at similar levels; however, this type of grass may recover more quickly.

Contact Pride in Turf to determine the best type of grass for your area and your lawn.

Cultural Controls

The following are some of the factors to consider:

**Make sure all areas drain well in your lawn, as moisture levels in the thatch and soil are an essential aspect of management. Poor soil drainage should be taken care of to prevent lawn diseases.

**Prevent and/or alleviate soil compaction and excessive thatch.

**Implement a sound program of fertilization according to recommended guidelines for your particular lawn. It's a good idea to get an updated soil test. Slow release nitrogen fertilizers only should be used.

Fertilize to maintain adequate but not lush growth during the growing season. Properly fertilized turf will recover quicker from disease injury than will under-fertilized turf.

**Cut grass at the proper mowing height for that type of grass. Generally, symptoms are more severe at low mowing heights.

Chemical Control

There are few fungicides available for the general public to use to manage zoysia patch control. You should contact a professional in order have this taken care of appropriately.

Contact Pride in Turf

Contact Pride in Turf to provide fungicide applications and provide professional services for any grass types you have in your lawn.

Pride in Turf can obtain and use the appropriate fungicide to treat any lawn diseases needed - ones that you do not have access to. Pride in Turf has professionals who will determine the best fungicide to treat your lawn.

Pride in Turf wants your lawn to be the envy of the neighborhood.

A regular fertilization program is important to maintain healthy, attractive turf. A fertilizer grade or analysis is the percentages of nitrogen (N), phosphorus (P), and potassium (K) in the fertilizer. You should choose a fertilizer for the total amount of nutrients in the container and the nitrogen source. It is usually wise to get a soil test to determine the needs of your lawn, and this will give you recommendations on the grade of fertilizer and amount needed to meet the needs of your lawn.

N-P-K Ratio for Lawns

Georgia law requires that fertilizer producers display the guaranteed grade or analysis on the fertilizer containers. The grade or analysis of fertilizer is the percentage of N (nitrogen), P (phosphorus), and K (potassium). If fertilizer is 16-4-8, for example, this means:

  • 16 (the first number) represents the percentage of Nitrogen (16%)
  • 4 (the second number) represents the percentage of Phosphorus (4%)
  • 8 (the third number) represents the percentage of Potassium (8%)

To figure the ratio, take the smallest number in the grade and divide it into each number of the grade.

*Example:  Fertilizer with a 3-1-2 ratio is 12-4-8.

To figure the ratio example above:  4 is the smallest number in a 12-4-8 grade, and it can be divided into 12 three times, and into 8 two times for a 3-1-2 ratio. 12-4-8 = 3-1-2.

Fertilizer Recommendations

Keep in mind that all lawns need nutrients/fertilizer during the growing season. Scientists recommend that you apply one pound of nitrogen to a thousand square feet of Bermuda grass monthly (or according to directions for your type of grass) during the growing season, for example. Remember the formula above to determine the actual nitrogen in your fertilizer. Also, remember that there is only a percentage of the materials in your fertilizer that are actual nutrients (hence the percentages). The other material in your bag of fertilizer is called filler or carrier.

Recommendations for fertilizer are based on the type of grass. There is not much difference in brands of fertilizer if you follow the directions on the label as directed. It’s more important to put the right nutrients on your lawn – no need to worry about name brands.

Choosing Fertilizer with Needed Nutrients

The big picture of lawns is that they all need nutrients during their growing season. It is important to know what the nutrients in your fertilizer do for your lawn. If you choose a fertilizer that is 29-3-4:   29% of it is Nitrogen, 3% of it is Phosphorous, and 4% of it is Potassium. 

  • Nitrogen helps build thick green lawns
  • Phosphorous helps promote strong vigorous root systems
  • Potassium helps to increase resistance to disease and drought

Since scientists recommend one pound of nitrogen be applied to 1,000 square feet of lawn, for example, you will have to apply less fertilizer with the fertilizer above (29-3-4) than one with a lesser percentage of nitrogen (example: 10-10-10).

Nitrogen Source

Nitrogen materials can be divided into two groups:   quickly available and/or slowly available.

Quickly Available
Also referred to as water-soluble
Immediately available to plants – provided there is adequate moisture usually less expensive cause growth flushedHave short soil residualHave high burn potential
Slowly Available
Also referred to as water insoluble or controlled release
Materials release nitrogen more gradually over long periods of time usually more expensive requires fewer applications reduce losses to teaching have low burn potential high-quality slow-release fertilizer should contain at least 30% of the nitrogen in the fertilizer in a slow-release form

As you can see, there are advantages and disadvantages to different types of fertilizer. You will need to determine which is best for your lawn and works best for you.

Conclusion

Fertilization of the lawn is important to keep it healthy, green, and beautiful. Following guidelines for your lawn and the type of grass you have will help give you the best results. A soil sample can give you the number of nutrients needed by your lawn. If you are unable to find a fertilizer with the exact specifications in your soil sample, you can select one that is closest to it. The type of fertilizer (granular or liquid, or quickly available / slowly available) can be a personal preference or based on the needs of your lawn. You want to add a fertilizer that has all the needed nutrients (N-P-K), but nitrogen is very important for that thick, lush lawn you want. If all of this is too complicated and you need guidance or help, contact Pride In Turf. They can advise you – or take the work off your hands. This will assure you of excellent results every time.

https://caes.uga.com

Pride-In-Turf is a local Atlanta lawn fertilizer company. Here are some pros and cons of both liquid and granular fertilizers. Hopefully, this helps you determine a choice for what best suits your lawn.

When trying to determine whether to purchase a liquid or granular fertilizer, there are many factors to consider.  There are no real hard and fast rules on this, and you can make your decision based on personal preference.  Some prefer to use a combination of both.  There are certain conditions where it may be best to use one over the other, depending on the needs of your lawn and what works best for you.  Some information about both liquid and granular fertilizers is included in this article to help you determine what works best for you.  Whichever type of fertilizer you choose, remember that they all should have the required nutrients ( N-P-K).

Liquid Fertilizer

Liquid formulations of fertilizer are diluted with water and sprayed on lawns.  A good time to spray liquid fertilizer on your lawn is after a good rain.  A gallon of liquid fertilizer that is mixed with water can cover a large area.  So, even though it is typically more expensive than granular fertilizer, it can be a better value.  You can use your liquid fertilizer on your lawn as well as plants.  Liquid fertilizers are quickly absorbed into the soil, which makes it easier for the nutrients to reach the roots.  The liquid does not last as long as granular fertilizers, however, and needs to be applied more often.  Typically, it should be applied every 2 – 3 weeks, but the coverage is more consistent.

Granular Fertilizer

Granular fertilizers are applied with a drop or rotary spreader.  It is best to divide the amount needed into two parts and apply it in two directions for a more uniform distribution.  Apply the fertilizer in one direction, then apply the other half in the other direction (at right angles from each other).  Granular fertilizers are on small, solid particles.  These dry organic granules are applied directly on the lawn.  Using granular fertilizer is easier to use when you want to spread it and forget it.  It also does not need to be applied as often as granular, as it lasts 4 – 6 weeks.

Is it Okay to Use Both Liquid and Granular Fertilizer?

Some people prefer to use both types of fertilizers.  If you decide to use both, you should use 50% of each type of fertilizer.  If you use both liquid and granular types of fertilizers, you will get excellent coverage on your lawn.  If you are using a preemergence fertilizer in the early Spring, it needs to be wet into the soil.  Using liquid fertilizer will provide this.  If you decide to use half the formula of liquid to get a jump start on your lawn, then add half the amount of granular on top, it will last longer and give that good coverage you want.

Advantages and Disadvantages of Liquid vs Granular Fertilizer

Below is a table of the advantages and disadvantages of both types of fertilizer.  Hope this helps you make the best determination for your lawn.

Liquid FertilizerGranular Fertilizer
AdvantagesDisadvantagesAdvantagesDisadvantages
Plants absorb nutrients immediatelyTypically more expensiveSlow-release formulas last longer.  Does not have to be spread as often.Nutrients are not uniform since each pellet has different nutrients (N, P, or K)
Quick-release – does not sit on soil for long period of timeHas to be added more frequentlyUsually not as expensiveTakes longer for plants to absorb nutrients
Same formulation of nutrients in every drop

Conclusion 

You can base which type of fertilizer you use on the needs of your lawn – or use which works best for you.  Remember that the timing of getting fertilizers on your lawn is important, as well as the type of grass you have.  Some of the factors above can help you determine which is best, or you can use a combination of both types of fertilizers.  If you are uncertain or do not have the time to do this, it is always a good idea to contact Pride-In-Turf.  They are a professional lawn care service and can determine exactly what your lawn needs.  You can be assured of a quality job that will give you the beautiful lawn you want.

How do I get a beautiful lawn? We get asked this a lot at Pride-In-Turf, and everyone wants a beautiful lawn that is green and thick. This is not an easy task and takes a lot of work. The types of grass, nutrients, and the right conditions to thrive are all important aspects of achieving this goal. Where you live is a factor, as different climates dictate the care needed. The types of grass that will work best, the fertilization your lawn will need, mowing at the right height, aeration, and water are all important for your beautiful, green, and thick lawn.  

Identify Your Grass

Make sure you know the turfgrass types that make up your lawn, especially if you inherited a lawn without knowing what type of grass you have. Different grass types require different care, so this is important to know how to support your grass for a beautiful, thick lawn. Georgia has a warm climate, and you will typically see Bermudagrass, St. Augustine grass, Centipede grass, or Zoysia grass. More and more recently, St. Augustine and Centipede are being used. These types of grasses require different care. If you are unsure which type you have in your lawn, you can contact a local UGA Extension agent.

Care for your Lawn

There are many steps to a beautiful green lawn. The following list gives you most of the steps you need to take, depending on the type of grass and the climate where you live. They are all important, but not necessarily in the order, they need to be done.

  • Start with improving your soil. You may need to test your soil (or have it tested) to find out the pH of your soil. Apply lime if the soil is too acidic or rich compost or sphagnum peat moss if it is too alkaline. You will want a pH of 5.5 – 6.5. You will need to fertilize every 4 – 6 weeks during the growing season.
  • Aerate your lawn at the appropriate time. Areas, such as Georgia, have clay soils. This type of soil needs aeration every year, as it is quick to get very compacted. Aeration helps loosen the soil letting in food, water, air, and nutrients that nourish your grass. It also provides better conditions for grass to develop a strong, healthy root system.
  • De-Thatch your lawn. Dethatching removes dead, organic matter that creates a thick, spongy layer. This allows water and nutrients to reach the soil and Improve airflow. This helps promote thick growth.
  • Fertilize your lawn. After aerating and dethatching (if needed), fertilize your lawn. This should be done right after you have completed aeration (and dethatching if needed) so that fertilizer can get down into the soil.
  • Overseed your lawn (or seed if you are starting a new lawn). This is when the seed can make good soil contact and achieve the highest germination rate.
  • Water your Lawn. If you are seeding your lawn, it is important to keep the soil moist for the best germination results. Watering daily, or more than once daily if needed) is important at this time. After about two weeks, when germination has taken place, you can cut back to once or twice per week.
  • Mow your lawn. Keeping your lawn mowed at the proper level for the type of grass you have is important. If you have seeded or overseeded, you should wait 2 – 3 weeks before mowing. Do not cut the grass more than 1/3 of the grass height to avoid stressing or weakening the grass.
  • Protect your lawn against pests. Balancing the moisture and thickness of your grass while avoiding over-watering will help in this area. Ensure proper drainage in your lawn so you do not have standing water. Treat with insecticides or fertilizer with insecticides in it as needed.
  • Manage weeds. If you do all of the above, this will discourage a weed invasion on your lawn. Some weeds thrive in certain types of soil (heavy in clay, highly acidic, or highly alkaline).  

If you are unsure of any of these steps, you can contact your local extension agent for advice. You may want to contact a professional landscaper who can guarantee you a beautiful lawn, such as Pride-In-Turf.

Timing is Important

Proper timing of lawn maintenance is key to establishing and maintaining a beautiful lawn. The table below gives you the best or optimal time to perform maintenance tasks for the best results: 

Type of GrassAerationFertilizationDethatchOverseedingWeed ControlMowing HeightWater
CentipedeB – May – July P – April
Use core aerator during the active growing season
B -May and July P – June and AugustP – May - JulyNot recommended
Spring pre-emergence:   B – Feb-March;  P-  April.
Broadleaf post-emergence: OK any time.
Grassy weed postemergence: B - May-August P – September
Winter pre-emergence: B – September P - October 
1 – 2 inches; Raise ½ inch higher in hot weather1 inch per week if no rainfall.
30 days of watering allowed for newly planted sod or seed.
Sod laid in the Fall or Winter months should be kept moist
St. AugustineB – May – July P – April or August
Use a core aerator during the active growing season
B – May-AugustP – May-AugustNoneCannot be established from seedSpring pre-emergence: B – Feb. – March; P – April
Broadleaf pre-emergence: Any time but March/April
Grassy weed postemergence: N/A
Winter pre-emergence: B – September; P - October
2 – 3 inches.Raise ½ inch higher when hot
Remove no more than 1/3 of total height at one time
1 inch per week if no rainfall.30 days watering for newly planted sod or seed.
Sod laid in Fall or Winter should be kept moist
BermudaB – May-August P – April or September
Use a core aerator during the active growing season
B – May-August P – April or SeptemberB – June/ July P – May / AugustB – May-August P – April or AugustSpring pre-emergence: B – Feb/March; P – April
Broadleaf preemergence: Spot spray any time of year
Grassy weed preemergence: B – May-August; P – September
Winter pre-emergence: B – September P - October
1 – 2 inches
Higher in hot weather
Remove no more than 1/3 of total height at one time
1 inch per week if no rainfall
30 days of watering allowed for newly planted sod or seed
Sod laid in the Fall or Winter months should be kept moist
ZoysiaB – May August P – April or September
Use a core aerator during the active growing season
B – May-August P – April or SeptemberB – June / July P – May or AugustNot recommended
Spring pre-emergence: B – Feb / MarchP – April
Broadleaf postemergence: Spray any time
Grassy weed postemergence: B – May-August P – September
Winter pre-emergence: B – September P - October
1 inch per week if no rainfall.
30 days of watering allowed for newly planted sod or seed.
Sod laid in Fall or Winter should be kept moist
1 – 2 inches
Mow ½ inch higher in hot weather.
Remove no more than 1/3 of total height at one time

Note:  This information pertains to Georgia, though it may apply to other areas with similar climates. It includes the Best (B) times/months as well as Possible (P) times/months.

Conclusion

This is a lot of information and may be somewhat overwhelming. Keeping a beautiful lawn is a large task. It is very rewarding for those who have the time and enjoys working outside on their lawn The type of grass and the climate are very important for the care needed to achieve the results you want You can always contact your local extension agent for advice or soil samples To save time and have the assurance of excellent results, contact Pride-In-Turf They can get you the results you want and save you time and money.

Everyone enjoys a beautiful lawn.  Aerating your lawn at the appropriate times along with overseeding and fertilizing can help you achieve the beautiful lawn you want.  Aerating your lawn can be done in the Spring; however, it depends on several factors to choose the best time for the best results.  Whether or not to aerate your lawn in the Spring depends on the climate in your area, soil conditions, and the type of grass you are using in your lawn.  Aerating at the best time is important.

When to Aerate in the Spring

For many areas, Fall or early Fall is the best time to aerate your lawn.  There are times when it is best to aerate in the Spring as well. If your lawn has become compacted and the grass is not growing well, early Spring may be a good time to aerate.  It is best to aerate between March and May, making sure you have waited until the last frost of the season.  You need to aerate before the Spring weeds start to germinate if at all possible for the best control of weeds.  You do not want to aerate during the heat of summer.  

To aerate in the Spring, you need to be able to know or estimate the soil temperature.  Here are the main points to consider:

  • Ground temperature should be at least 50 degrees
  • Air temperature should have been at least 59 degrees for two weeks.  This will give more assurance that the soil temperatures are at 50 degrees

Keep in mind that overseeding goes hand in hand with aerating, so the type of grass you are using is also a consideration.

What Temperature is Good for Overseeding

Again, this depends on the type of grass you are using as well as the climate.  In warmer climates, such as Georgia, you can aerate and overseed as late as June, depending on the type of grass you are using.  Grasses such as Bermuda or Zoysia are types of grass that can be seeded in Spring or early summer.

The following table may help in determining when to aerate your lawn and overseed, depending on your climate and the type of grass you use:

Type of GrassRegion / ClimateWhen to Aerate / Overseed
BermudaSoutheast Region / Warm and humid Southwest Region / high temperatures – needs more watering due to dry climateSpring – March-May After frost and when temperatures are consistently 59 degrees 
CentipedeSouth / Gulf Coast Region / Hot  and humid Early Spring / After frost and when temperatures are 59 degrees
BahiagrassSouth / Gulf Coast Region / Hot and HumidEarly Spring – when temperatures consistently above 55 degrees
ZoysiaSouthern / Transition Zones/ Cool Season (some types are more heat tolerant)Early Fall – Soil temperatures between 50 and 65 degrees 
FescueNortheast / Transition Zone/ Cool season (some are more heat tolerant)Early Fall – Soil temperatures between 50 and 65 degrees

This chart is not all-inclusive of types of grass and regions but should give you an idea of differences depending on the type of climate and which grass is best for your area.

Conclusion

As you can see, it is okay to aerate your lawn in the Spring – especially if you live in a warmer climate and uses grass suitable for that climate.  In some areas, it is actually the best time to aerate.  Aeration and overseeding go hand in hand, so be sure to overseed your lawn at the same time.  Of course, you should also fertilize your lawn at the time of aeration and keep it watered so the ground is moist until the seeds germinate.  Then, as the growing season gets into full gear, your lawn should start to revitalize and look beautiful.

A lot of time can go into going through the whole process.  If you do not have the time or are unsure of what to do, it is best to contact a professional for the best results.  Pride-In-Turf will get you the absolute best results and save you a lot of time.  Often, you can end up saving money by hiring a professional, such as Pride-In-Turf as well.

Should you water after aerating your lawn?  The answer to that is YES.  However, there are other things you need to do after aerating first.  Actually, after you have followed all the steps which will be discussed in this article, you definitely need to water the lawn.  For the first 2 – 3 weeks after aerating, your lawn should be watered daily – or maybe more than once daily if needed.  This is a critical growth phase for your new grass, and you want to hydrate the roots for optimal development.  Once the seeds germinate and the grass is sprouting, you can go back to watering as usual ( 2 – 3 times per week or as needed, depending on rain and the moisture level of the soil).

What to Do After Aerating Your Lawn

After aerating your lawn, it does not look pretty.  Don’t worry – this is the first good step to a greener, more beautiful lawn.  The following are some tips on what to do after aerating:

  1.  Leave the soil plugs on your lawn to decompose and filter back into the holes left by aerating
  2. Apply fertilizer immediately after aerating (or as soon as possible – definitely within or before 48 hours).  This puts nutrients into the grassroots.
  3. Reseed the lawn, especially where the grass is thin.
  4. Then – WATER.  As stated above, you should water daily (or more than once daily) but not too long at one time.  You do not want to soak the lawn at this point, but you do want to keep it moist.
  5. It is best not to walk on the lawn any more than absolutely necessary.  Walking on the lawn after aerating will compact the soil and make it more difficult for the seeds to get the nutrients and water they need to germinate.

Should You Mow After Aerating

You should not mow your lawn after aerating until your new grass finishes germinating.  It is actually best to wait until the new grass is between three or four inches tall.  This is difficult, but it is best to give that new grass a good start before mowing.  Mow your lawn prior to aerating if at all possible, because it will be a while before you can mow again.  

What to Expect After Aerating

After following the procedures stated above after aerating your lawn, the following is what you can expect:

  • Immediately:  You will have less compacted soil and will have broken up your thatch
  • Two Weeks:  By about 2 weeks, the plugs you removed while aerating should finish breaking down
  • Two to Four Weeks:  Depending on the type of grass you have, this is when germination takes place
  • Seven to Ten Weeks:  Now your grass should have deeper, more extensive root systems.  It should grow fuller, giving your lawn fewer thin spots 

Conclusion

Aeration is quite a process, and many other tasks need to be done to get the results you want.  It takes time and patience.  Remember, that your yard will not be pretty when this process is in the early stages.  However, if all is done correctly, you will end up with a green, lush lawn that will give you much enjoyment.

If this process seems overwhelming, and you are worried about timing things right or using the right products, consider hiring a lawn care expert.  Pride In Turf has professionals who can take care of your needs and get you the gorgeous lawn you want.

linkedin facebook pinterest youtube rss twitter instagram facebook-blank rss-blank linkedin-blank pinterest youtube twitter instagram